Watercolor Plus - Using Washes and Shading
The following are the instructions for the past 2 weeks of class starting with the second phase of the Fall Leaves followed by 2 kinds of shading round objects.
I do want you to note that even though these subjects are very different - leaves and pumpkins - the technique is the same: A series of washes or layers of color to achieve a goal. The techniques may be few but their applications are limited only by the artist.
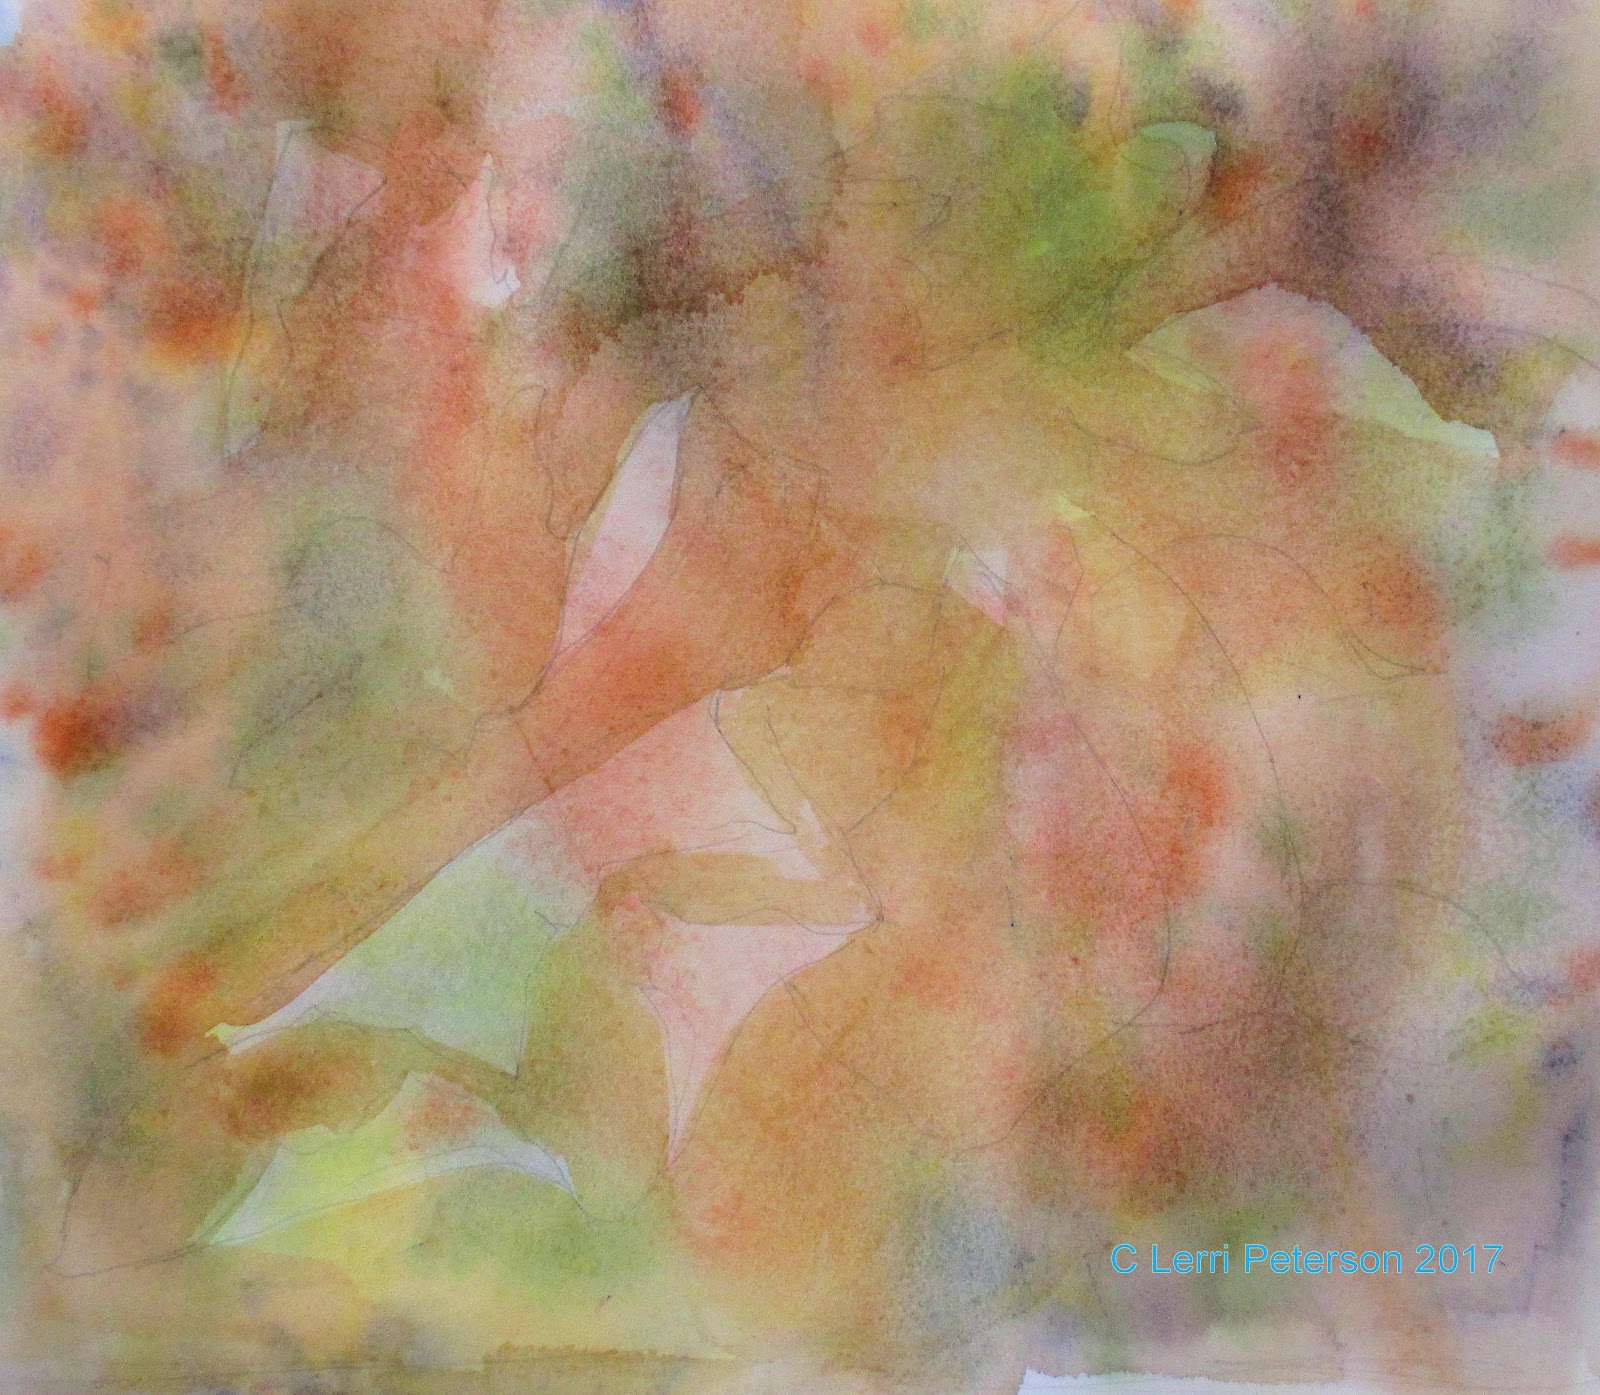
Starting where I left off leaving more and more leaves leaves unpainted, I added 2 more layers of wash each time leaving more leaves unpainted. I stopped here only because I wanted to move on but wanted to show that once you got your own leaves to a level where you wanted to stop, then you could start adding detail.
I also did some lifting when I added the 2 new layers by using a clean damp brush to lift out leaf and twig shapes (I was using my angle brush), rinse and dry often when doing this technique or you will just move paint from one place to another. I let each new layer dry completely before adding the next, this is important or you could end up mixing mud when you stir up previous layers of color.
I looked for places like the curls on the leaves to add more color to make them darker or to suggest one leaf over the other.
Basically at this point I am starting detail and I am looking to see where I need to add shadows and color and textures. This, for me, is the fun part because if you stick with it and increase depth with shadow, color and detail the painting starts to come alive. Depending on how much detail you want to put into a painting will determine the amount of time it will take, if you are detail oriented you must be patient with this process.
Adding color to the leaves will give them character adding things like bug bites, holes and cracks just adds to that character of the leaf. The holes and bug bites were made with just a darker color (sienna and blue), which represents the bottom of the leaf that is in shadow.
Go out and look at leaves on the ground and see how they are decaying and changing color and shape. Take photos and keep a reference file either on your computer or a physical file of photos (you may end up with many files if you do this right). The more you see as an artists the more you will understand what you need to do to accomplish your goals for your paintings. Doing studies and drawings will also hope you along your artistic path, don't overlook doing studies or drawing because you "just want to paint" they are all connected.
This is where I stopped in class because we ran out of time. If I get a chance I will do some more work to make it look a bit more finished. I could make this look very realistic from this point, we will see.
Like I said, do as much as you personally feel like doing, this is an exercise to show you how to use washes to create depths and values in your painting, the detail is the fun stuff but you will learn a lot from doing it.
Shading Pumpkins
This Pumpkin actually has 2 washes of color. the first wash is the light orange you see near the top where the pumpkin will receive the most light, the yellow will be the highlight for this pumpkin. The second wash is the darker orange, leaving part of the first wash on the pumpkin the light orange
On the stem, the first wash is the light green was the first wash, the darker green was the second wash.
Note the little mark of orange on the side of the pumpkin, both the first AND the second wash were that value. The second wash appears darker because of the layers of color.
It is important to let the layers dry between washes.
The second pumpkin was done a different way using washes of grey to just do the values of the pumpkin first and later we add the color.
Note: the orange on the stem is because I had some orange on my brush at the time. It doesn't hurt anything.
The grey I use is usually a mix or ultramarine blue and burnt sienna, leaning more to the blue side. this time I was using that mix along with the "pallet" grey I get from adding water to all the paint in the cool section of my pallet, so it may have had a bit of everything to start.
Again, this is a couple of layers of the grey, I started with a bit darker mix (see the dark mark on the side) starting in the darkest area of the pumpkin which will be the bottom and the side away from the light source, then I took a damp brush and moved the color up the sides of the pumpkin, rinsing often until I had just a faint wash of color at the top. I left an area unpainted for the highlight. I repeat this process until I get the value in all areas that I am looking for.
Several layers later and adding a bit of blue to the final wash for the shadows, this is the result for the first pumpkin. I also used a dark mix of UM blue, a touch of sienna and alizarin crimson with enough water so it would flow (still needs to be transparent) to create the shadow on the ground and the shadow of the stem on the pumpkin.
I also use that color with a bit more water to suggest the ribs of the pumpkin.
This is the second pumpkin with a wash or two of orange and yellow for the highlight. Let it dry between washes, you may not need to add more than one layer if you did the under painting correctly and use a wash of orange that is a bit stronger than the washes on the other pumpkin, remember the water to keep it transparent.
I used the same mix as before for the shadows on the table and from the stem, but lifted the highlights on the ribs of the pumpkin. Where it goes darker on those rib lines was just the color from my brush.
Below is a comparison to the 2 techniques.
A Fall Proposal Weeks 3 and 4
In week 3 of this project I worked to start defining the leaves in the bouquet by adding color to the ends of the leaves and shadows where they go under other leaves or the paper or just into the bulk of the bouquet. Remember you are just suggesting leaves, if you make some general leaf shapes you will be giving your viewer enough info to understand what it is, you don't need to spell it out.
You will be doing both positive painting (painting the thing) and negative painting when you do shadows. Please look at the photo and look at things around you to see how one object casts a shadow on another before you start painting, it will help you understand what you are to be doing.
I also started working on the flowers. The red flower has darker reds near the center, I used alizarin and UM blue so it was a very cool red color. Also notice the darker shadows I added around the flower and how I used a shadow color (the alizarin and blue but more blue this time) to create leaves with negative painting.
Finally, I did a wash of that same shadow color to create the shadows of the folds in the fabric. It looks more purple because I had a wash of red on there before but it is actually more to the blue side before it went on the paper.
PLEASE!!! Look at the folds in the photo or take some cloth and LOOK at how the folds and creases are soft, different shapes, sizes and widths you will need to blend the edges of your strokes after you put them down, use a damp large brush to blend both sides of the color you just put down or you can wet the area first so the brush strokes will soften as you go, THIS IS IMPORTANT so you material looks soft.
This was the end of week 3.
On week 4 I did more of what I had started with the leaves but I also went into the fabric again this time with an overall (the fabric area) wash of alizarin and napthol red. In the shadowed part of the fabric after a couple of washes of the red, I added some UM blue so the color was a bit more purple. It will all get a lot darker than it is now if I have time.
(I think it was the camera exposure that makes the box look lighter, it could also be comparison to the previous lighter background and the now darker background, FYI)
I lifted out the suggestion of wrinkles in the shadow while the darker bluish wash was still damp.
You can use the darker background color to define the edges of your flowers or to leave bits of the lighter background color as highlights on the edges of flowers.
While it is hard to see, I did put a pale wash of yellow on the white flowers. this is just a tint so it was more water than color. I want the sparkle of the diamond to be the whitest thing in my painting so I needed to bring down the whiteness of the flowers and still make them look white.
Finally, I added color to the bottle. In the darker areas I used a strong mix of UM Blue, and alizarin crimson occasionally adding more of the crimson where it might be picking up light and more blue in the shadowed side. Noticed that along the bottom and the side, I left a little of the green under painting showing to suggest the bottle's glass.
Where the light is hitting the bottle, I used a damp brush with just water to blend out the edges, a bit of Hooker's green where the glass is in the light but leaving the original under painting for the highlight. Again I used a clean damp brush to blend the to blend the highlights into the other areas . Do this just around the edges of the color so the center stays light.
That is where we ended on week 4 and should catch us up for the past 2 weeks. We will continue on this painting and I think we may get it done in the next 2 weeks, at least that is what I am hoping.
Keep painting and I will see you in class.
P.S. If you are in the intermediate class on Monday, you might want to read through the first blog to catch up on basic watercolor techniques. We are using them all in this painting.
Saturday, October 21, 2017
Sunday, October 8, 2017
Fall 2017 Watercolor Class
As I mentioned last week the first post will be for the Watercolor Plus class followed by the Intermediate class project.
Watercolor Plus - Learning Washes
Learning how to add layers of color by using thin layers of washes or glazes is very important to the watercolor artists, this is how we work. We build our paintings from the white paper to our darkest dark by adding several layers of washes. This is something you need to remember as a beginner because each layer of wash we lay down on our paper has an effect on the next layer we add on top of it. This is how we build value and intensify color and still keep the transparent quality of the watercolor.
In this exercise we gathered leaves to create a design then we laid down our first wash of many colors. First I wet the paper so that it was very wet, I want the colors to spread and bleed together, the water helps this process, this is called wet into wet painting (wet paper with wet paint).
Next I literally dropped different colors of paint onto my paper or just lightly touch the paper with my brush. the top of my paper was slightly elevated to that gravity could help me. When I got something I liked, I let it dry completely.
When the paper was dry, I looked at my sketch to determine which things in my design I thought should be the lightest because I will NOT be painting these areas.
I mixed a thin wash of burnt sienna - though color is not important her but the thinness of the color is - and water and - this IS important - I painted EVERYTHING EXCEPT THE AREAS I WANTED TO STAY LIGHT. That includes all the leaves AND the back ground EVERYTHING. I was working wet paint onto dry paper.
Then I let it dry. This is also important other wise you will get blooms and muddy colors.
Close up on one of the first areas I left without painting.
I have numbered these so you can see the difference. Some of the variation in the lightness of the 1st area is because what was underneath was a bit darker. Remember: Watercolor is a transparent medium.
I chose the areas I wanted to leave unpainted with my second wash (2) then mixed a similar color of sienna with touches or orange. Again working on dry paper with wet paint.
The next was was the same consistency as the first, it was a very thin wash but because I am building up the color and the value with each wash, it looks darker.
Close-up after the second wash.
This is where we ended for the day, we will continue on this in the next class so I hope that you have a chance to practice this and have your study to this point for class.
Don't get frustrated with yourself, watercolor is a challenging medium but it is also a very rewarding medium once you understand it. Be patient with the process and yourself, it will come.
A Fall Proposal Watercolor Project Week 2
We left off with our paper under painted and we have masked off the roses and the ring. This week we start adding in more color to the bouquet.
Using the photo as a guide, I added blocks of color where the leaves will be and where flowers and berries might be.
You can think about the general shape of the leaves but at this point you don't need to PAINT individual leaves just yet, just color and shape.
I got my colors a bit too dark so if yours are lighter than this you did better than I did.
BTW, I removed the masking from the roses at the end of the day when I was finished adding colors because after this point I will be a bit more careful in how I apply the paint. I did leave it on the ring area though.
I started adding color to the sunflowers and tried to get the general shape of the petals but I know that I can - and will - shape them better when I get into the darker background and shadows down the line.
I used my cad yellow light with just a little touch of orange for the petals and orange for the darker color.
The red sunflowers were all the same red, alizarin and napthol, the color was changed by adding more water.
The "flowers" of the hydrangea are just shapes that give the impression of flower petals only a couple actually look like flowers, the rest are just shapes. Let the viewer fill in the missing pieces with just a few clues.
This is where I left off in class last time, I will start working on the white roses and the bottle this next class and I hope to start working on the drape and paper around the bouquet as well. A lot to do so I hope you have your painting near this point.
Keep painting and I will see you in class.
Watercolor Plus - Learning Washes
Learning how to add layers of color by using thin layers of washes or glazes is very important to the watercolor artists, this is how we work. We build our paintings from the white paper to our darkest dark by adding several layers of washes. This is something you need to remember as a beginner because each layer of wash we lay down on our paper has an effect on the next layer we add on top of it. This is how we build value and intensify color and still keep the transparent quality of the watercolor.
In this exercise we gathered leaves to create a design then we laid down our first wash of many colors. First I wet the paper so that it was very wet, I want the colors to spread and bleed together, the water helps this process, this is called wet into wet painting (wet paper with wet paint).
Next I literally dropped different colors of paint onto my paper or just lightly touch the paper with my brush. the top of my paper was slightly elevated to that gravity could help me. When I got something I liked, I let it dry completely.
When the paper was dry, I looked at my sketch to determine which things in my design I thought should be the lightest because I will NOT be painting these areas.
I mixed a thin wash of burnt sienna - though color is not important her but the thinness of the color is - and water and - this IS important - I painted EVERYTHING EXCEPT THE AREAS I WANTED TO STAY LIGHT. That includes all the leaves AND the back ground EVERYTHING. I was working wet paint onto dry paper.
Then I let it dry. This is also important other wise you will get blooms and muddy colors.
Close up on one of the first areas I left without painting.
I have numbered these so you can see the difference. Some of the variation in the lightness of the 1st area is because what was underneath was a bit darker. Remember: Watercolor is a transparent medium.
I chose the areas I wanted to leave unpainted with my second wash (2) then mixed a similar color of sienna with touches or orange. Again working on dry paper with wet paint.
The next was was the same consistency as the first, it was a very thin wash but because I am building up the color and the value with each wash, it looks darker.
Close-up after the second wash.
This is where we ended for the day, we will continue on this in the next class so I hope that you have a chance to practice this and have your study to this point for class.
Don't get frustrated with yourself, watercolor is a challenging medium but it is also a very rewarding medium once you understand it. Be patient with the process and yourself, it will come.
A Fall Proposal Watercolor Project Week 2
We left off with our paper under painted and we have masked off the roses and the ring. This week we start adding in more color to the bouquet.
Using the photo as a guide, I added blocks of color where the leaves will be and where flowers and berries might be.
You can think about the general shape of the leaves but at this point you don't need to PAINT individual leaves just yet, just color and shape.
I got my colors a bit too dark so if yours are lighter than this you did better than I did.
BTW, I removed the masking from the roses at the end of the day when I was finished adding colors because after this point I will be a bit more careful in how I apply the paint. I did leave it on the ring area though.
I started adding color to the sunflowers and tried to get the general shape of the petals but I know that I can - and will - shape them better when I get into the darker background and shadows down the line.
I used my cad yellow light with just a little touch of orange for the petals and orange for the darker color.
The red sunflowers were all the same red, alizarin and napthol, the color was changed by adding more water.
The "flowers" of the hydrangea are just shapes that give the impression of flower petals only a couple actually look like flowers, the rest are just shapes. Let the viewer fill in the missing pieces with just a few clues.
This is where I left off in class last time, I will start working on the white roses and the bottle this next class and I hope to start working on the drape and paper around the bouquet as well. A lot to do so I hope you have your painting near this point.
Keep painting and I will see you in class.
Saturday, September 30, 2017
2017 Fall Watercolor Classes Week 1
Fall 2017 Combined Watercolor and Watercolor Plus Page
I now have 2 watercolor classes: A beginning and an intermediate class. I will post the notes for the beginning class first, the intermediate class will follow. - LP
Watercolor Plus - There won't be a blog for the basic strokes we covered in our last class because there is a page set up especially for basic watercolor strokes. Look at the top of the sidebar (←) and you will see a list of permanent pages, click on the Basic Strokes to see what we covered in class.
Watercolor Project: An Autumn Proposal Week 1
This week we got the under painting done for our project. The first thing I did was to cover areas that I needed to be white with masking fluid. In the photos it will be the blue/grey color that is over the area for the roses and the ring. Once the masking was dry, I started in the bouquet area by wetting it first (you may need to wet it several times so the area will stay wet because we will be working wet into wet) before adding my paint.
Remember you work from light to dark in watercolor so add lots of water to your paint before you drop it on your paper. I started with the yellow areas first where the sunflowers will be. Please notice that I am not painting the sunflowers, I am just putting down the first lightest color by touching my brush with paint to the wet paper. let it do it's own thing. All other colors from here out will be darker, at best the yellow may give the following layers (glazes or washes) a bit of a glow DO NOT PAINT THE THINGS that will come later. I created the edges of the sunflowers and the rest of the bouquet in the next step when I put in the under painting for the background.
Work quickly just adding different colors into the bouquet area then let it dry.
When the bouquet area is dry, you will do a similar thing with the background by first wetting the area and painting in with a very watered down red (napthol or cad red medium). However, when you get around the sunflowers, the edges of the bouquet and the wine bottle, you want to paint around the edges with both the water and the paint. This will create so basic forms for later when we get into painting the "things".
I suggest that you paint the bottle after you paint the bouquet so they will dry together. Again, wet the area first then drop in the thin colors into the bottle. I used sap green and touches of ultramarine blue for the glass. I let that part dry before painting in the label with a little yellow and burnt sienna.
I got the shape off on my bottle a bit so I will have to fix it later but for now, I have the whole painting under painted, now we start the fleshing out the details part next class.
Try to get your painting up to this point by class if you can. Keep painting and I will see you in class.
I now have 2 watercolor classes: A beginning and an intermediate class. I will post the notes for the beginning class first, the intermediate class will follow. - LP
Watercolor Plus - There won't be a blog for the basic strokes we covered in our last class because there is a page set up especially for basic watercolor strokes. Look at the top of the sidebar (←) and you will see a list of permanent pages, click on the Basic Strokes to see what we covered in class.
Watercolor Project: An Autumn Proposal Week 1
This week we got the under painting done for our project. The first thing I did was to cover areas that I needed to be white with masking fluid. In the photos it will be the blue/grey color that is over the area for the roses and the ring. Once the masking was dry, I started in the bouquet area by wetting it first (you may need to wet it several times so the area will stay wet because we will be working wet into wet) before adding my paint.
Remember you work from light to dark in watercolor so add lots of water to your paint before you drop it on your paper. I started with the yellow areas first where the sunflowers will be. Please notice that I am not painting the sunflowers, I am just putting down the first lightest color by touching my brush with paint to the wet paper. let it do it's own thing. All other colors from here out will be darker, at best the yellow may give the following layers (glazes or washes) a bit of a glow DO NOT PAINT THE THINGS that will come later. I created the edges of the sunflowers and the rest of the bouquet in the next step when I put in the under painting for the background.
Work quickly just adding different colors into the bouquet area then let it dry.
When the bouquet area is dry, you will do a similar thing with the background by first wetting the area and painting in with a very watered down red (napthol or cad red medium). However, when you get around the sunflowers, the edges of the bouquet and the wine bottle, you want to paint around the edges with both the water and the paint. This will create so basic forms for later when we get into painting the "things".
I suggest that you paint the bottle after you paint the bouquet so they will dry together. Again, wet the area first then drop in the thin colors into the bottle. I used sap green and touches of ultramarine blue for the glass. I let that part dry before painting in the label with a little yellow and burnt sienna.
I got the shape off on my bottle a bit so I will have to fix it later but for now, I have the whole painting under painted, now we start the fleshing out the details part next class.
Try to get your painting up to this point by class if you can. Keep painting and I will see you in class.
Sunday, August 13, 2017
Summer 2017 Watercolor Class
Watercolor Class: Textures in Watercolor
A couple weeks ago we had a fun time in class creating our own watercolor samples of different ways to make textures in our watercolors. I am posting a few of the things we explored but it is better if you do this for yourself so you can see what the real texture looks like, sometimes a photo only says a few words and leave you guessing.
I had 4 different kinds of salt: table salt, rock salt in a grinder, rock salt and popcorn salt. Each of the different sizes has its own look, table salt works the best but knowing how the other work may come in handy in the future. For best results I found if you wait until the shine has gone of the painted area before you add the salt you will get better results. Too wet and you don't see much, too dry and it doesn't do much. This take practice to fine tune.
The baking soda didn't do much but this was the first time I had used it. May have to try again.
I used regular coffee (decafe, but the doesn't make a difference) and sprinkled the grounds on very wet paper and let it dry. You can get the look of old stained paper.
The wax resist and the scraping are permanent so only do them if you are sure it is what you want to do.
Wax resist acts a lot like masking but it never comes off. Some artists will sign their name with the wax then let the name develop with each glaze or color. this can be good for breaking waves, highlights and can be put over painted areas if you want to keep that color. Use a white candle or paraffin.
The scraping can be done with a knife or Exacto blade or you can use an old credit card and cut angles and points into. Scraping damages the paper surface so it is permanent.
Alcohol can be put in a spray bottle or just use a toothbrush and flick it on. Like the salt, wait until the shine leave the paint before hitting it with the alcohol for best results.
The green one is water spritzed on with a toothbrush. A bit different than the alcohol because it has more time to work to create blooms. Wait for the paper to lose its shine for best results.
I just used some India ink and brush to make lines, you can use paint then spritzed it with my squirt bottle in places. Ink needs to be wet/
Lifting with a paper towel can make great soft clouds. Find a towel like Viva or a tissue without a pattern to use for this technique or it make leave that pattern in the paint.
Sponges can also be used to create texture. Natural sea sponges have a lot of different textures all on one sponge if you look for the right one at the store. Just dip it into your paint
and tap it on the paper. The harder you tap the more paint comes off so start gently.
You can do a similar thing with a scrunched up paper towel.
Wetting the paper first then dropping or lightly adding color can create some soft diffused patterns that are great for out of focus backgrounds.
Here are 2 examples of how to use scraping and lifting to create veins in a leaf.
This is just a small sample of what kinds of things you can do with watercolor and a bit of experimenting, look through your cupboards and see what else you can find.
Until next time keep painting and I will see you in class.
A couple weeks ago we had a fun time in class creating our own watercolor samples of different ways to make textures in our watercolors. I am posting a few of the things we explored but it is better if you do this for yourself so you can see what the real texture looks like, sometimes a photo only says a few words and leave you guessing.
The plastic wrap needs to first be wrinkled up the placed on wet paint. Don't try to smooth it you want all the wrinkles and creases. This will take at least 45 minutes to an hour to dry depending on the weather, setting it near a heat source or outside in the sun will help a bit but it has to dry through the paper and that takes a while so be patient.
Masking Fluid into wet paper, this one is tricky but very useful when doing something like sea foam or clouds. Wet the paper first with clear water then paint the masking into the areas you want to protect and let it dry before painting over it or it could get into your good brush.
Masking fluid on dry paper is the traditional way of using masking fluid. Paint out the areas you want to keep white and let it dry before starting to paint. In both cases let your painting dry completely before removing the masking or you run the risk of tearing your paper.
The baking soda didn't do much but this was the first time I had used it. May have to try again.
I used regular coffee (decafe, but the doesn't make a difference) and sprinkled the grounds on very wet paper and let it dry. You can get the look of old stained paper.
The wax resist and the scraping are permanent so only do them if you are sure it is what you want to do.
Wax resist acts a lot like masking but it never comes off. Some artists will sign their name with the wax then let the name develop with each glaze or color. this can be good for breaking waves, highlights and can be put over painted areas if you want to keep that color. Use a white candle or paraffin.
The scraping can be done with a knife or Exacto blade or you can use an old credit card and cut angles and points into. Scraping damages the paper surface so it is permanent.
Alcohol can be put in a spray bottle or just use a toothbrush and flick it on. Like the salt, wait until the shine leave the paint before hitting it with the alcohol for best results.
The green one is water spritzed on with a toothbrush. A bit different than the alcohol because it has more time to work to create blooms. Wait for the paper to lose its shine for best results.
I just used some India ink and brush to make lines, you can use paint then spritzed it with my squirt bottle in places. Ink needs to be wet/
Lifting with a paper towel can make great soft clouds. Find a towel like Viva or a tissue without a pattern to use for this technique or it make leave that pattern in the paint.
Sponges can also be used to create texture. Natural sea sponges have a lot of different textures all on one sponge if you look for the right one at the store. Just dip it into your paint
and tap it on the paper. The harder you tap the more paint comes off so start gently.
You can do a similar thing with a scrunched up paper towel.
Wetting the paper first then dropping or lightly adding color can create some soft diffused patterns that are great for out of focus backgrounds.
Here are 2 examples of how to use scraping and lifting to create veins in a leaf.
This is just a small sample of what kinds of things you can do with watercolor and a bit of experimenting, look through your cupboards and see what else you can find.
Until next time keep painting and I will see you in class.
Saturday, July 29, 2017
Summer 2017 Watercolor Class
Watercolor Project: Summer Fun Week 4
I was finishing up my painting this week and put in the tire tracks with just a light shadow color (blue, purple and water) and made a series of little comma strokes. Making a series of comma strokes is better than just painting a line for several reasons: First a line looks way to straight and it doesn't look flat. Second the comma strokes can be varied in size to make the peaks look taller of flatter depending on the height of the "up" part of the comma. This is sand, so it is going to have a lot of variation depending on new tracks or people walking across the tracks. Finally, the bottom of the comma should flatten out so that visually the sand levels off between the ridges ___/ making you sand look flat. This takes practice and understanding, for now just trust me on this.
At the ends of some of the tracks I took some of the splash colors and used them at the very ends of the tracks, held my paper at an angle then added enough paint and water to make it drip, this ties it in to the drippy part of the painting and is optional if you want to try it. Remember we are experimenting with this painting and it is just a piece of paper.
The other thing I like to do when I am doing this splashing technique is to go over edges or and small detail with a permanent ink, fine point marker. If you have an India ink pen that works also.
The lines help define the edges of things that might get lost in the splatters, try to keep the more solid lines in the foreground and broken ones in the background. The "AVE C" I did with a small paint brush and some gray I had on my palette.
As far as I am concerned, I am finished with my lifeguard tower, you can always find more to do but at some point you need to stop and live with it for a few days. Se it aside and don't look at it, after a few days set it up and step back 6 - 10 feet and look at it. If nothing jumps out at you, you are done. It is wise to not assess your work when you are sitting right on top of it, you need to stand back and see it in total and/or you can look at it in a mirror or upside down even upside down in a mirror, if nothing stands out like a sore thumb, it is done.
Next week we are going to be doing some more experimenting but this time we will be making samples of textures using various techniques like salt and Saran Wrap, you can use the backs of old painting you don't like or scraps of watercolor paper. This is a fun thing to do and will give you a catalog of textures as reference for future painting.
keep painting and I will see you in class.
I was finishing up my painting this week and put in the tire tracks with just a light shadow color (blue, purple and water) and made a series of little comma strokes. Making a series of comma strokes is better than just painting a line for several reasons: First a line looks way to straight and it doesn't look flat. Second the comma strokes can be varied in size to make the peaks look taller of flatter depending on the height of the "up" part of the comma. This is sand, so it is going to have a lot of variation depending on new tracks or people walking across the tracks. Finally, the bottom of the comma should flatten out so that visually the sand levels off between the ridges ___/ making you sand look flat. This takes practice and understanding, for now just trust me on this.
At the ends of some of the tracks I took some of the splash colors and used them at the very ends of the tracks, held my paper at an angle then added enough paint and water to make it drip, this ties it in to the drippy part of the painting and is optional if you want to try it. Remember we are experimenting with this painting and it is just a piece of paper.
The other thing I like to do when I am doing this splashing technique is to go over edges or and small detail with a permanent ink, fine point marker. If you have an India ink pen that works also.
The lines help define the edges of things that might get lost in the splatters, try to keep the more solid lines in the foreground and broken ones in the background. The "AVE C" I did with a small paint brush and some gray I had on my palette.
As far as I am concerned, I am finished with my lifeguard tower, you can always find more to do but at some point you need to stop and live with it for a few days. Se it aside and don't look at it, after a few days set it up and step back 6 - 10 feet and look at it. If nothing jumps out at you, you are done. It is wise to not assess your work when you are sitting right on top of it, you need to stand back and see it in total and/or you can look at it in a mirror or upside down even upside down in a mirror, if nothing stands out like a sore thumb, it is done.
Next week we are going to be doing some more experimenting but this time we will be making samples of textures using various techniques like salt and Saran Wrap, you can use the backs of old painting you don't like or scraps of watercolor paper. This is a fun thing to do and will give you a catalog of textures as reference for future painting.
keep painting and I will see you in class.
Saturday, July 22, 2017
Summer 2017 Watercolor Class
Watercolor Project: Summer Fun Week 3
When you are working in watercolor, you work in layers or washes to build up value (darks) and color intensity (strength of the color), this is what I was doing in class this last time.
I added another layer of color over all of my lifeguard tower to intensify the color and to help it stand out from the back ground. I also added more dark colors in the shadows to make them stronger which give more intensity to the light in way of contrast.
I also added the shadow under the tower with a mixture of ultramarine blue and a tiny amount of purple to make a lavender blue color. Please look at the shape of the shadow on the ground because it will help set your tower down, it has a unique shape under the ramp and at the front of the tower. Most of you just painted a solid stripe the same width and shape from the ramp to the back of the tower totally missing the fact that the ramp is offset to the other side of the platform and that here is some light that goes under the tower because the sun is low in the sky. ALWAYS LOOK BEFORE YOU PAINT. Shadows are important and they have their own shape, be aware of that fact.
The poster on the back of the tower doesn't require a microscope to put in what looks like writing and pictures. This is where negative painting comes in. Leave the areas you want as writing or the little squares you see in the photo, the under painting that is there PAINT AROUND those areas with a darker color so you leave the lighter under painting which now becomes a suggestion of words and pictures.
I also started to add shadows to the railings and posts.
I think I will be finishing up my project next week but if you still need to work on it longer take you time finishing you own project, we have about 3 weeks left in the semester. If you are done with your project bring something of your own in to work on and I can help you get started on your project.
Keep painting and I will see you in class.
When you are working in watercolor, you work in layers or washes to build up value (darks) and color intensity (strength of the color), this is what I was doing in class this last time.
I added another layer of color over all of my lifeguard tower to intensify the color and to help it stand out from the back ground. I also added more dark colors in the shadows to make them stronger which give more intensity to the light in way of contrast.
I also added the shadow under the tower with a mixture of ultramarine blue and a tiny amount of purple to make a lavender blue color. Please look at the shape of the shadow on the ground because it will help set your tower down, it has a unique shape under the ramp and at the front of the tower. Most of you just painted a solid stripe the same width and shape from the ramp to the back of the tower totally missing the fact that the ramp is offset to the other side of the platform and that here is some light that goes under the tower because the sun is low in the sky. ALWAYS LOOK BEFORE YOU PAINT. Shadows are important and they have their own shape, be aware of that fact.
The poster on the back of the tower doesn't require a microscope to put in what looks like writing and pictures. This is where negative painting comes in. Leave the areas you want as writing or the little squares you see in the photo, the under painting that is there PAINT AROUND those areas with a darker color so you leave the lighter under painting which now becomes a suggestion of words and pictures.
I also started to add shadows to the railings and posts.
I think I will be finishing up my project next week but if you still need to work on it longer take you time finishing you own project, we have about 3 weeks left in the semester. If you are done with your project bring something of your own in to work on and I can help you get started on your project.
Keep painting and I will see you in class.
Sunday, July 16, 2017
Summer 2017 Watercolor Class
Watercolor Project: Summer Fun Week 2
In our last class I started the under painting for the lifeguard tower and the sand.
Remember that in watercolor we work from light to dark so if we need something to be light we need to save it.
The first thing I did was to paint the entire tower, except for the windows, with a light wash of color. I didn't paint around any of the posts or railings, I painted EVERYTHING in this first color. This will be come highlights if I need them. (I used my Cheap Joe's color of Andrew's Turquoise you can use any blue or add a touch of green to the blue if you want.)
When this wash was dry, I added some purple to my color and this time I painted around the railings and other light areas and put a wash of color over everything that is darker or in shadow. I may do this several more times to bring up not only the value (light vs dark) but also to increase the intensity of the color or its vividness. Watercolor dries lighter so getting the right amount of intensity can take several layers and it is better to sneak up on the color rather than trying to get it in one shot because you end up putting the color on too thick and lose the watercolor look in your painting.
The windows are done in a couple of steps. the first step are the window frames. Because they are in shadow they are not white or we could leave the white of the paper. I mixed a gray of ultramarine blue and a touch of burnt sienna with a lot of water to make a tint of gray and covered the whole area and let it dry. I re-wet just the window pane areas with water and wend over with a light wash of blue, let it dry for just a second or two, then took a stronger mix of blue with a touch of purple (very little purple or you can use a touch of alizarin) then just made some shapes in the window. Look at the photo and all you will see inside the tower are dark shapes, that is all you are creating.
The flag is pretty simple, the thing you need to remember is the top and bottom stripes are red and the stripe under the blue is white. With my small angled shader, I used my ultramarine blue and just dabbed it in where the blue should be leaving a few white spots showing. You do not need to do all 50 stars, just suggest them. Same with the stripes. Because the flag is waving the stripes are not straight and may disappear or you only see parts of them. Don't over think it, keep it simple.
I will be continuing from this point in class, I hope you can get your paintings to this point for class.
Keep painting and I will see you in class,
In our last class I started the under painting for the lifeguard tower and the sand.
Remember that in watercolor we work from light to dark so if we need something to be light we need to save it.
The first thing I did was to paint the entire tower, except for the windows, with a light wash of color. I didn't paint around any of the posts or railings, I painted EVERYTHING in this first color. This will be come highlights if I need them. (I used my Cheap Joe's color of Andrew's Turquoise you can use any blue or add a touch of green to the blue if you want.)
When this wash was dry, I added some purple to my color and this time I painted around the railings and other light areas and put a wash of color over everything that is darker or in shadow. I may do this several more times to bring up not only the value (light vs dark) but also to increase the intensity of the color or its vividness. Watercolor dries lighter so getting the right amount of intensity can take several layers and it is better to sneak up on the color rather than trying to get it in one shot because you end up putting the color on too thick and lose the watercolor look in your painting.
The windows are done in a couple of steps. the first step are the window frames. Because they are in shadow they are not white or we could leave the white of the paper. I mixed a gray of ultramarine blue and a touch of burnt sienna with a lot of water to make a tint of gray and covered the whole area and let it dry. I re-wet just the window pane areas with water and wend over with a light wash of blue, let it dry for just a second or two, then took a stronger mix of blue with a touch of purple (very little purple or you can use a touch of alizarin) then just made some shapes in the window. Look at the photo and all you will see inside the tower are dark shapes, that is all you are creating.
The flag is pretty simple, the thing you need to remember is the top and bottom stripes are red and the stripe under the blue is white. With my small angled shader, I used my ultramarine blue and just dabbed it in where the blue should be leaving a few white spots showing. You do not need to do all 50 stars, just suggest them. Same with the stripes. Because the flag is waving the stripes are not straight and may disappear or you only see parts of them. Don't over think it, keep it simple.
I will be continuing from this point in class, I hope you can get your paintings to this point for class.
Keep painting and I will see you in class,
Subscribe to:
Posts (Atom)