Class Project: Farmer's Market Week 3
One thing I don't mention often enough is composition, and it is one of the most important things to a pleasing painting. This painting has very simple composition with strong perspective lines leading you into the painting. Also, things are placed in critical areas such as the worker and the purple flowers, they are on or near the "thirds" of the painting and with the pineapple in the corner for a triangle keeping you in the painting. Yes, I was thinking this as I was taking the photo, good composition is just as important in photography as it is in painting and many cameras have a thirds grid that you can use when you are composing a photo, use it rather then the center focus circle when you are taking photos and you will see an improvement in your photos and your art.
One of the things about a painting like this is because there are so many elements involved, you can move around the painting so that one area can dry while you work on another area in that way you bring it all up to the same level as you paint. Don't get stuck in one place not only will it look over worked but you will also create mud.
When I did the lettering I did break out my 1/4" angle brush but the letters are not hard to do. Using the sharp edge of the brush, I just touched the paper, gave a tiny side pull then moved on to the next letter and let them dry before adding the outline done the same way without the pull. The art work that looks like oranges on the end are just round orange circles I let dry then added some green leafy marks. Don't sweat the small stuff, just suggest the letters and shapes your viewer will do the rest.
The floor was painted with water first then starting with the light color (yellow and a touch of orange), I covered the floor area. While it was still wet, I picked up sienna and orange, starting about his foot, applied that color on the lower part of the floor and finally, I added blue to the sienna for the very foreground to suggest sunlight and shadows. Because watercolor dries lighter, I may have to do this again.
If you have under painted the flowers with light colors as you should have, creating the impression of a bunch or mums is simple. Again I used my 1/4" angle brush (you can use a small round or flat brush) mixing first a slightly darker purple (purple with a tiny touch of blue and water) and once again using the edge of the brush, I just touched the paper to give the suggestion of petals, leaving some of the lighter color for the centers. Look at the photo before you start this, even practice on a separate piece of paper if you have to it is very easy once you figure it out but it will take practice. The dark purple is the same colors less water. The leaves are done the same way, same brush just use green.
We have at least another week or two on this painting, do what you can and I will see you in class.
Watercolor Class Project: Farmer's Market Week 2
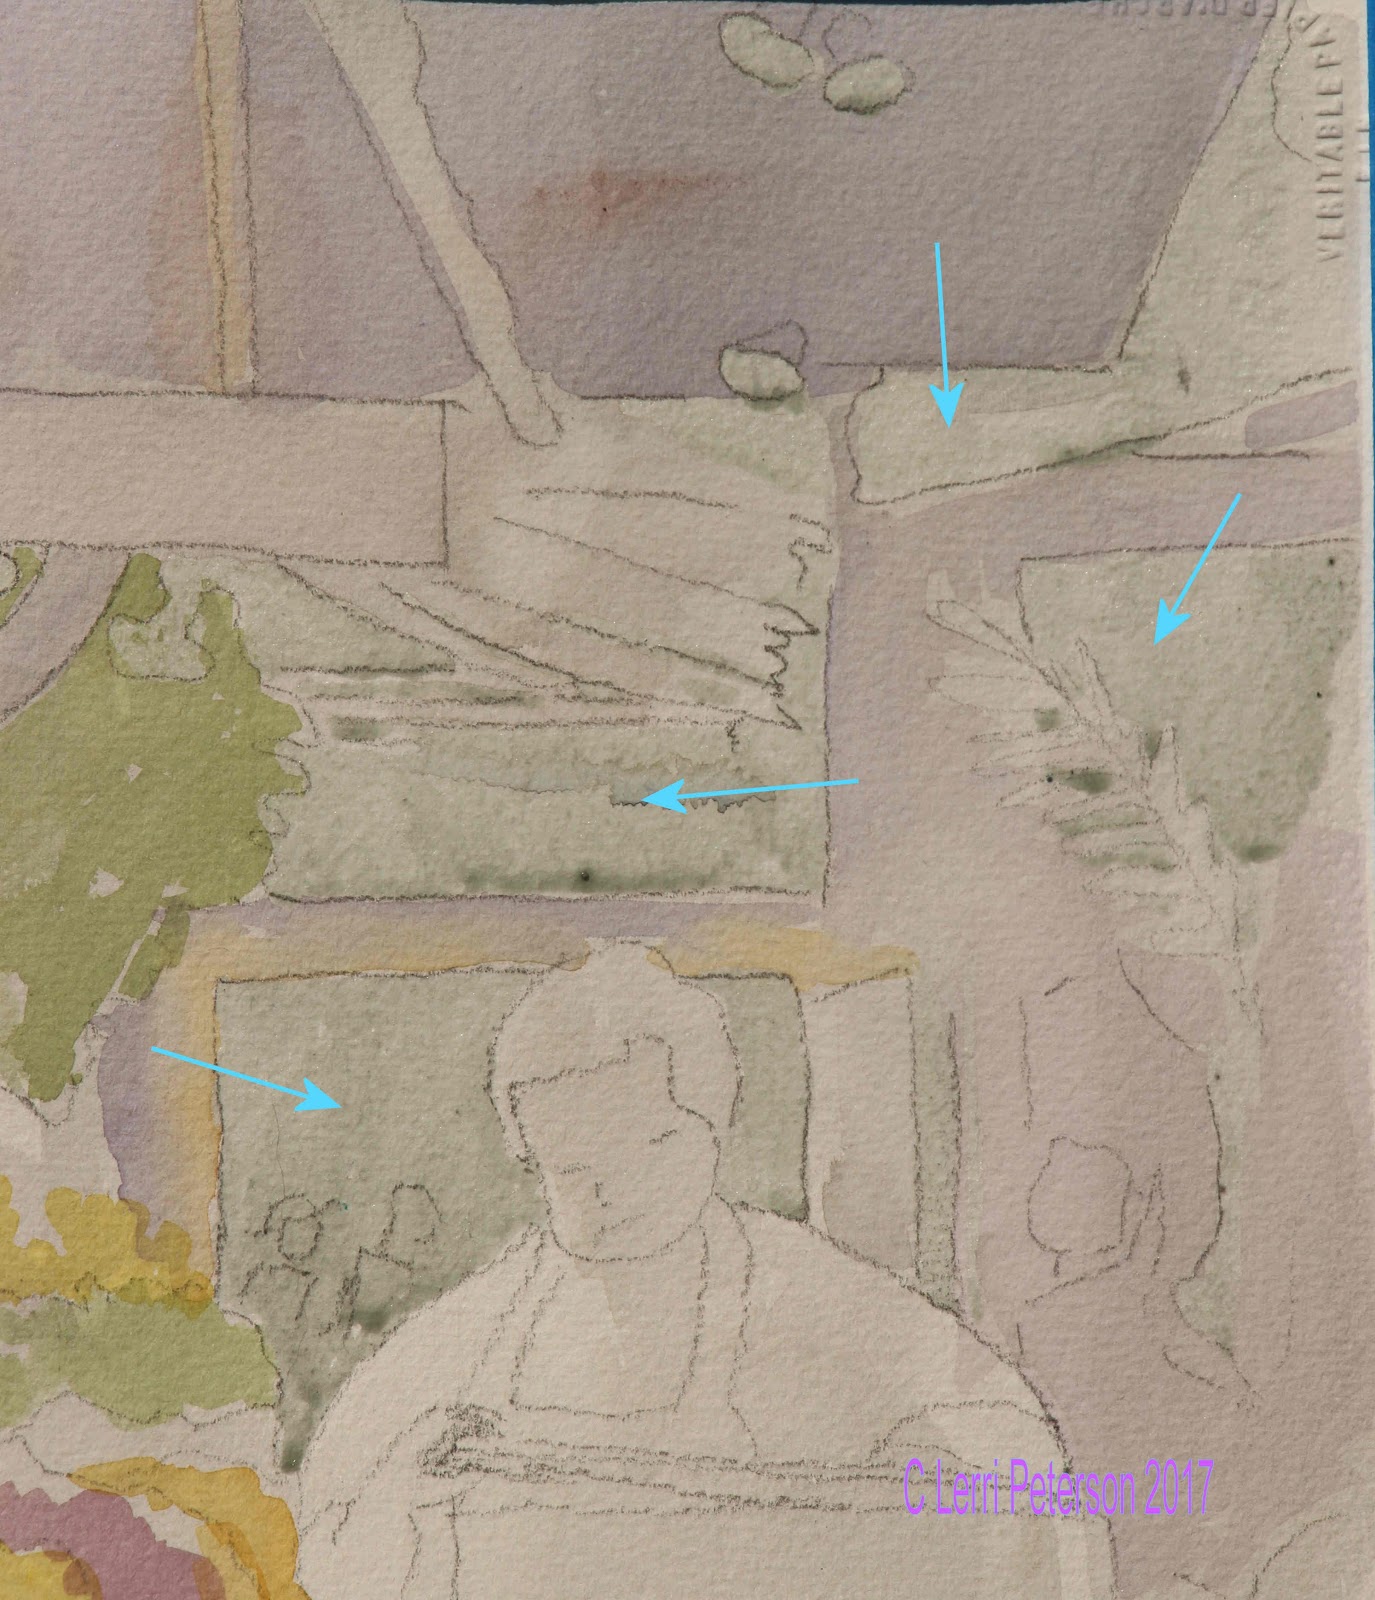
When I started class I continued to add value to areas I needed darker and where I wanted it a bit more finished before I took off the masking. When I was satisfied that I had my values dark enough, I let my painting dry and then removed the masking (arrows). Notice how each layer of values looks compared to the white paper that was under the masking, this is how you create light in a painting using the contrast rule.
Detail of the areas that were covered in masking.
Area where the lights will be. In after thought, I probably should have made this area even a bit darker before taking off the masking but it will be okay.
Now with the masking off my painting I can see how areas look and where I need to add more shadow and contrast, for now, however, I started adding some suggested detail. I want you to note that there are no defined shapes in these background subjects, they are just color that suggests something there. don't make a bunch of circles, make overlapping circular shapes leaving some of the under color for highlights and contrast. Save detail for the foreground, only suggestions in the back ground.
I darkened the hair of the worker and did a bit of work on the apron. The dark color is a mix of ultramarine blue and either burnt umber or burnt sienna, the apron was a mix of crimson, napthol red and some blue to darken, I also used this color on the apples and plums in the background.
I also wanted it to look like some light is coming in from the door in the back ground so I added a mix or yellow and burnt sienna to make a golden color that I put on the floor.
This is where I left off in class. While I am now getting into the detail of the painting I am not fussing with it, save the one haired brushes for the final accents but at this point I am still at the suggestion stage. Take your time but don't sit in one place in your painting. Work around and through your painting bringing all of it up at the same time to the same point, otherwise you can run the risk of overworking your painting.
Keep painting and I will see you in class.
Watercolor Project: Farmer's Market Week 1
The first thing I did after I had my drawing on my paper was to protect the areas I wanted to leave white with masking fluid (blue arrows). This will allow me to do washes and work with a bigger brush and not worry about painting around areas I want left white. I will remove it after I am mostly done working in that area and not worried about accidentally going over my white areas.
Only the protected part of the paper will be left white, everything else and be brought down in value.
Next I applied several washes of a neutral gray to tint the rest of the paper. I used what I call "palette gray" made by mixing all the leftover paint in the cool area of my palette, but if you need to mix the color, my standard gray is ultramarine blue and burnt sienna, remember to use lots of water so it is only a tint.
Look at the arrows in this second image and you will see 3 layers of this gray I added (arrows) The top of his head is the value of the first wash, I let it dry. I then went over all of the next darkest areas (see the wall arrow) with another layer of gray leaving lighter areas unpainted, I let it dry before adding yet another layer of value to even darker areas of my painting leaving lighter areas unpainted.
Please note: You do not need to make darker and darker mixtures of gray, you use the same value you started with when you did the first light wash. Because watercolor is transparent, if you let it dry first before adding the next layer, the layer(s) underneath will make the new layer look darker because of the previous layer(s) will show through.
You should have your reference photo in front of you so you can refer to it as you paint these layers of value. See where the light hits the worker's shoulders then moves into shadows on his chest and face? Paint around these areas with the next layer of tint, this will work to your advantage as you progress.
After I did several layers of the gray tint, I started adding color into areas where the fruit will be. Note that it is just a mass of color, not individual pieces of fruit and also not that the tint is light, remember that in watercolor you work from light to dark so this first color represents the lightest colors you will see.
The 2 toned patch in the foreground is done wet into wet. Either add a second color into the first while it is wet by just touching areas with the new color or if you have let it dry, re-wet the area then touch the area with the new color. Let the paint do most of the work, just drop and touch in the wet and the paint will do the rest.
Also, I had protected the mini-lights with masking at the start of the painting as well (see arrows). They should be dots close together in the background and more like dashes as they come forward and spaced further apart.
This is as far as I got in our first class. Do not be intimidated by the complexity of a subject, you can only paint it one brush stroke at a time, so relax and take your time, think about what you are painting and why breaking it down to one brush stroke at a time then even the most complicated of paintings will come together in the end. Be patient with yourself and the process.
Keep painting and I will see you in class.