There are times as artists we need to get out of our comfort zone and try new things just to expand our skills, our knowledge and to face our fears - yes fears. We are so afraid of making "mistakes" we forget that art is suppose to be fun, and I often fall into that category my self. I will see the rut I am in from the bottom looking up and realize I am just going through the motions and I need to find something that really challenges me and that is how I got into splattering.
I was in a rut reading one of my watercolor magazines when I came across an article on a woman artist and she started all her watercolors by splattering. It looked interesting and really wasn't in my comfort zone but if I didn't like it all I was out was a bit of time and a piece of paper. I had so much fun I started looking for more subjects where I could use splattering.
I find it works best if you have a simple subject but I have used it very effectively with more complicated subjects, I just think it brings a sparkle and a bit of fun when used in a simple setting.
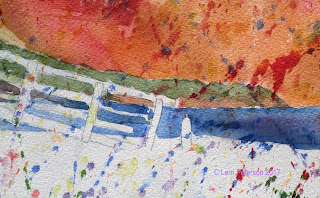
I took the photo of the life guard tower and thought what fun this would be to add a bit of summer fun with splattering. I used my warmer colors (red, orange and yellow) in the sky but didn't sweat it if they went everywhere, same with the cooler colors (blue, purple and green) I used in the land area. It just doesn't matter. What does matter is to know when to stop. It can feel really good to just throw paint then next thing you know you have a pool of mud on your paper. You can always add more.
I had already put my drawing on the paper so I now needed to start working on the back ground.
 |
| Notice how the negative painting makes the tower stand out. |
The color you choose is up to you for your sky, I wanted it to say "California Sun" so I started with my yellow around the tower moving it out from the tower and the top of PV. While it was still wet, I went right into my orange and started the orange just inside the yellow and let the watercolor blend itself (the yellow needs to be wet for this to happen). I repeated this with my red but as I moved the red out towards the edges of the paper, I rinsed my brush often and used just water to move the red until it faded out. Rinsing your brush often is key to this technique.
The PV cliff were done using burnt sienna, a touch of blue and water to thin the color, the green trees I added Hooker's green to the sienna color to gray the green.
The water was my ultramarine blue with water and touches of thin purple.
Don't forget to paint the water and the cliffs behind the railings of the tower. This is called negative painting when you paint around an area and in watercolor it is important to remember this technique.
Try to have your paintings to this point when we meet again in class. I will be continuing from this point.


No comments:
Post a Comment