

Watercolor
Project: Az. Fall
Week
2
Most
of what we did in class this week was to continue negative painting around our
trees. When you are doing something you are new to doing or unsure of you
naturally go slower and that is fine, speed will come in time and practice. It
is better to slow down and think about what you are doing than to rush ahead
and end up with big problems. However, if you do run across a problem or you
want to change things, all is not lost. Regardless of what some might think, you
can make changes in watercolor, it might be a bit more challenging than in
other mediums but it can be done and you should know how to fix problems
because as a painter – watercolor or otherwise – there is always something you
see that you want to fix or change in almost every painting you do. Do not be
afraid to make these changes, because they happen and they will continue to
happen as long as you paint.
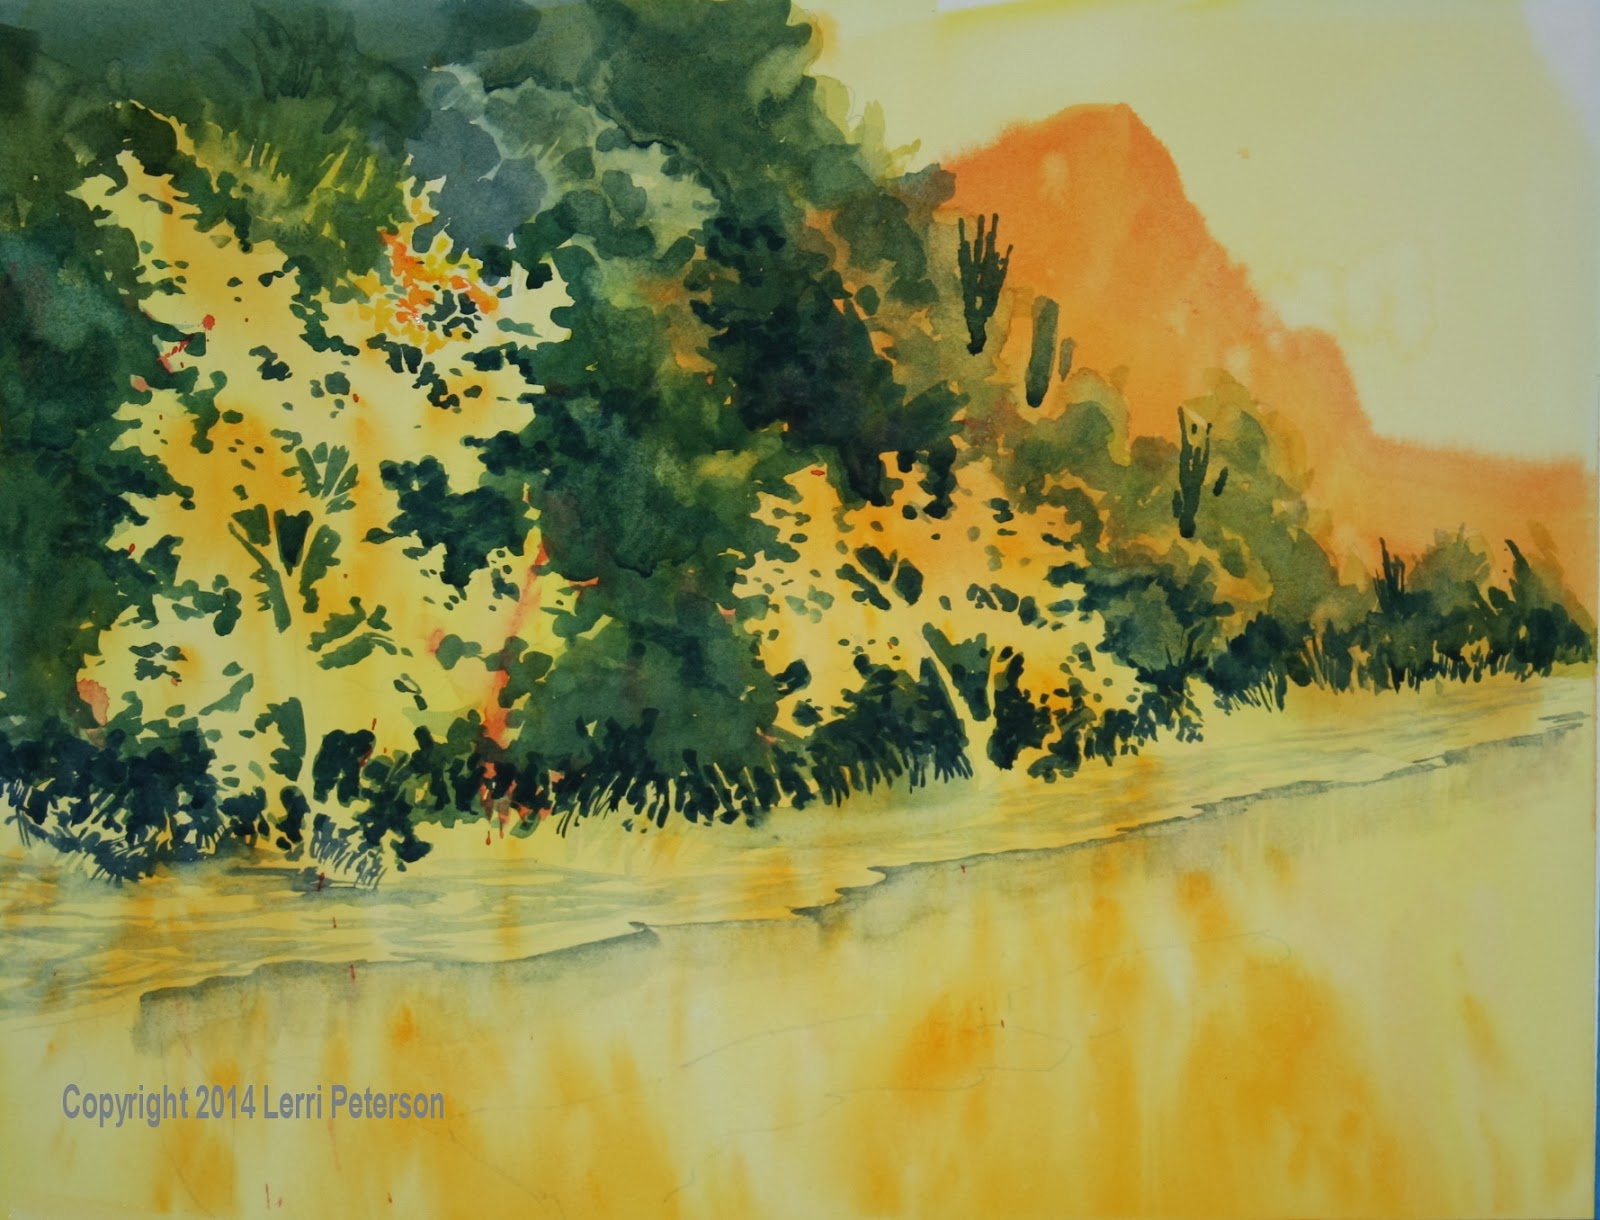 |
| Where we stopped in class. |
A
couple of the students made the mistake of positive painting the trees with the
hillside color. Negative painting is not a natural way of doing things so when
you are learning it is easy enough to switch from the negative to the positive
– painting the “thing” and not the space around the thing. We all do it
at some point or another no matter how experienced we are, what experience give
you is the knowledge on how to fix a problem so you don’t panic and make it
worse.
There
are several ways to fix a problem like the above and I covered 2 ways to fix
the problem. The first way was to “lift” the color off the paper. Lifting is a
fun thing to do in watercolor, in can add texture, highlights, leaf veins and
countless other things to make you painting interesting and it can also take
enough color off an area that you either mistakenly painted over or want to
change. You just need a brush, water, a clean paper towel and a bit of time.
First
you wet your brush and lightly dry it with your paper towel so that it isn’t
dripping, it can still be on the wet-side, then paint the area with the water
lightly going over the area to reactivate the pigment on the paper. Blot your
brush on the towel frequently, rinse it out to get off any color that came up
and repeat the process. You can also blot the paper to lift up even more color,
the one thing you do need to be careful of is damaging the paper. If you go
over an area too much and it gets too wet or if you scrub too hard with your
brush or both, you run the risk of damaging the surface of the paper. If you do
damage the paper, it will not take the color the same way and you may get dark
blotchy areas when you tried to lift. It is best if you do a little lifting,
then let the paper dry and try again if it needs it. Remember that when the
pigment and the paper are wet they will be darker than when they are dry so
once it dries, it might be light enough for you to go ahead with whatever
changes you wanted to do.
The
other method I showed was a fairly recent addition to our watercolor tool box,
and that is the use of the “Magic Eraser” by Mr. Clean. It is a soft sponge which
is filled with a cleaner that doesn’t seem to harm the paper. It comes in a box
with 2 sponges and I just cut mine into 1” or so squares that are easy to throw
in my art box and it is easier to use than a big sponge. There are times when
you have a bigger area you need to take the color off of or you have used a
staining color that won’t lift easily, it is those times that the Magic Eraser
does work its magic. It might not get the paper back down to paper white, but
it will get enough of it out that unless you point it out to people, they will
never know so don’t tell them! You don’t need to use them dripping with water,
just a bit damp and, again, be careful not to work the area too long or too
hard because you could damage the surface of the paper.
The
other thing we did in class is to start working on the water’s edge. The thing
to keep in

Once
you get your sketch on your paper we are now going to add the start ofreflections down into the water. There is usually a dark edge and it is
probably best if you do this in sections. I used my ½” angle brush and the
color I used was a mix of blue with a touch of sienna and a tiny touch of
purple to create a shadow color which I loaded onto the tip of my brush. If you
use a round brush just load the tip and if you use a flat brush, just load a
corner, be sure to rinse your brush before you load it. Putting the tip of my
brush where I want to start the edge and the rest of the brush on the paper, I
pulled the color along the edge of my water. I just did a few inches, then I
rinsed and dried my brush then with the damp, clean brush, I pulled that color
I just put

I
also used that color was on my brush to create the shadows in the dirt alongthe shoreline. Again, my strokes were fairly flat because the dirt was flat. We
will work more on the dirt and the water in our next class. Try to get your
painting to this point, remember the more you do something the easier it
becomes the next time so get some card or divide a practice paper up into
sections and practice your techniques, also become more observant of your
surroundings, don’t just “look” at things, really try to “see” the world around
you, it will make you a better artist. See you next time.
No comments:
Post a Comment