Winter
2013 Watercolor
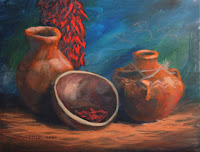
Project:
Clay Pot Still Life
 |
| Original set-up at home. |
This
project is going to be a bit different from other projects we have done in the
past. There is no reference photo. There is no drawing, there is only the
set-up in class which we will all be working from and it is going to be
different for everyone depending on where you are sitting in relationship to
the set-up. I want to be a bit more methodical with our approach to this
project though I do encourage students to work at their own pace, some are
going to find this easy but most others will find it a challenge.
 |
| Set up at PV. Note change of angle, better lighting. |
It
is totally different working from real life whether it is working plein air or
working from a set up in a studio, the artist is faced with challenges you do
not have when working from a photo everything from how do you crop your
subject? WHERE do you crop your subject? Composition of the subject on your
paper/canvas and other things you don’t usually think about when you work from
a photo that has a lot of that already taken care of for you. It is also easier
to draw from a 2-dimentional photograph then to draw from the 3-dimensional world, this is where drawing skills come in handy and you will see how
important they are if you want to improve as an artist.
 |
| Detailed sketches from home set-up |
I
start out doing what are called “thumbnail sketches” both vertical and
horizontal of the subject. This helps me with a couple of things: first of all
it helps me see my composition and to define the boundaries of my painting and
where my light source is. A common problem when you are working from life is to
make your subject too small on your paper or canvas including too much of the
surrounding space that has little to do with the subject. By drawing in a
couple rough rectangles on your sketch paper and placing the elements of your
subject within those rectangles you can “fill up” the space that will
eventually translate to your paper or canvas. The sketches themselves can be as
detailed or un-detailed as you think you need, they can be anything from some
basic shapes to a detailed drawing or something in between, as long as it works
for you, that is all that matters. Write down any information in the margins
you think you might need next to your thumbnail such as where the light is the
angle (high or low) how many peppers were in the bowl to start…Whatever you
think may be needed as your painting progresses.
 |
| Quick sketches from PV |
The
other thing about doing thumbnails, it lets you see is whether you want to do
it vertically (portrait) or horizontal (landscape). I look at the negative
space to see which way I want to paint. My subject should take up the biggest percentage
of my paper or canvas, if in one direction my negative space is nearly equal to
or greater than the space my subject occupies then I need to look at the other
position or if there is some way I can adjust my design to fill up the space
without compromising my composition. There are many things to work out before
you ever set brush to paint.
This
is also where your camera comes in handy. You want to take your photo from
where you are working, if you have a zoom so much the better you can use it to
crop the subject taking both vertical and horizontal photos. Remember if you
work standing up take the photos while standing, if you are sitting take them
while you are sitting. If your camera does not have a zoom or can’t get in
close enough you can come up to the set-up but try to take the photo from the
angle you see it from where you are working, it won’t be a perfect reference
but it will be close.
 |
| Acrylic "sketch" |
Once
you have your design settled you may want to do some color sketches or a rough
painting to give you an idea of what colors you will be using. The background
on this one is going to be up to you so you might want to experiment with just
blotches of color to see what you like best. Another thing you might want to do
before moving on to your watercolor paper or canvas is to do a line drawing on
regular drawing paper that you can use to transfer your design to your paper,
this will allow you to do as much erasing as you need to do without hurting
your watercolor paper and can be more efficient when trying to get your design
on a canvas. I usually work out my design on the paper then use a Sharpie to
make my lines clearer before transferring to my paper or canvas.
When
working in watercolor, I tend to choose how I am going to start my painting
partially by instinct forged over decades but also by subject need. It is about
50/50 and by need what I mean is what I feel is the most important aspect of
what I am painting, in this case, for me, it is the light and dark of the
subject the color – while important – isn’t as important as establishing the
light and the shadows. At PV I am going to do a gray-scale under painting to
start my painting, at Torrance I will do a different technique so you can see
the difference. There are countless ways to approach a painting and I try to
show you different way so you can find what works for you.
 |
| Used gray washes to find my values. |
I
started by first masking out my whitest whites. I squinted while looking at the
subject and it turns out that the only things that really showed white were the
highlights on the peppers. Their surfaces are shiny and reflect the light
better than the soft mat surfaces to the pots. Everything else got a wash of a
very watered down gray. EVERYTHING! This wash becomes my next lightest value.
With each wash of gray, I leave a bit of the previous gray wash untouched,
building to my darkest darks. I will eventually introduce color but not until I
feel I have my values established. The string of peppers don’t need to be a
meticulous chore, they are just shapes and all I am doing is adding shapes that
will become the darker areas of the peppers by making quick slashes and dabs
with my brush. Don’t over think this.
Please
remember to sit where you were sitting in the previous class so you have the
same perspective as you continue working on your painting.


No comments:
Post a Comment